Dynamics 365 (formerly Dynamics CRM)
This page is concerned with the technical aspects of our integrations with Dynamics 365. The integration is compatible with Dynamics 365 Power Platform applications that contain the Account, Person and Lead (optional) entities.
Keep your data up-to-date
Like all of our integrations, you can keep your data up-to-date the moment a change occurs. This is done using our Monitoring services. For Dynamics CRM, we allow you to choose between two ways of getting your updates; direct update of the data, or notifications about updates that can then be reacted to however you see fit.
Option 1: Direct update of data ('Opdater felter')
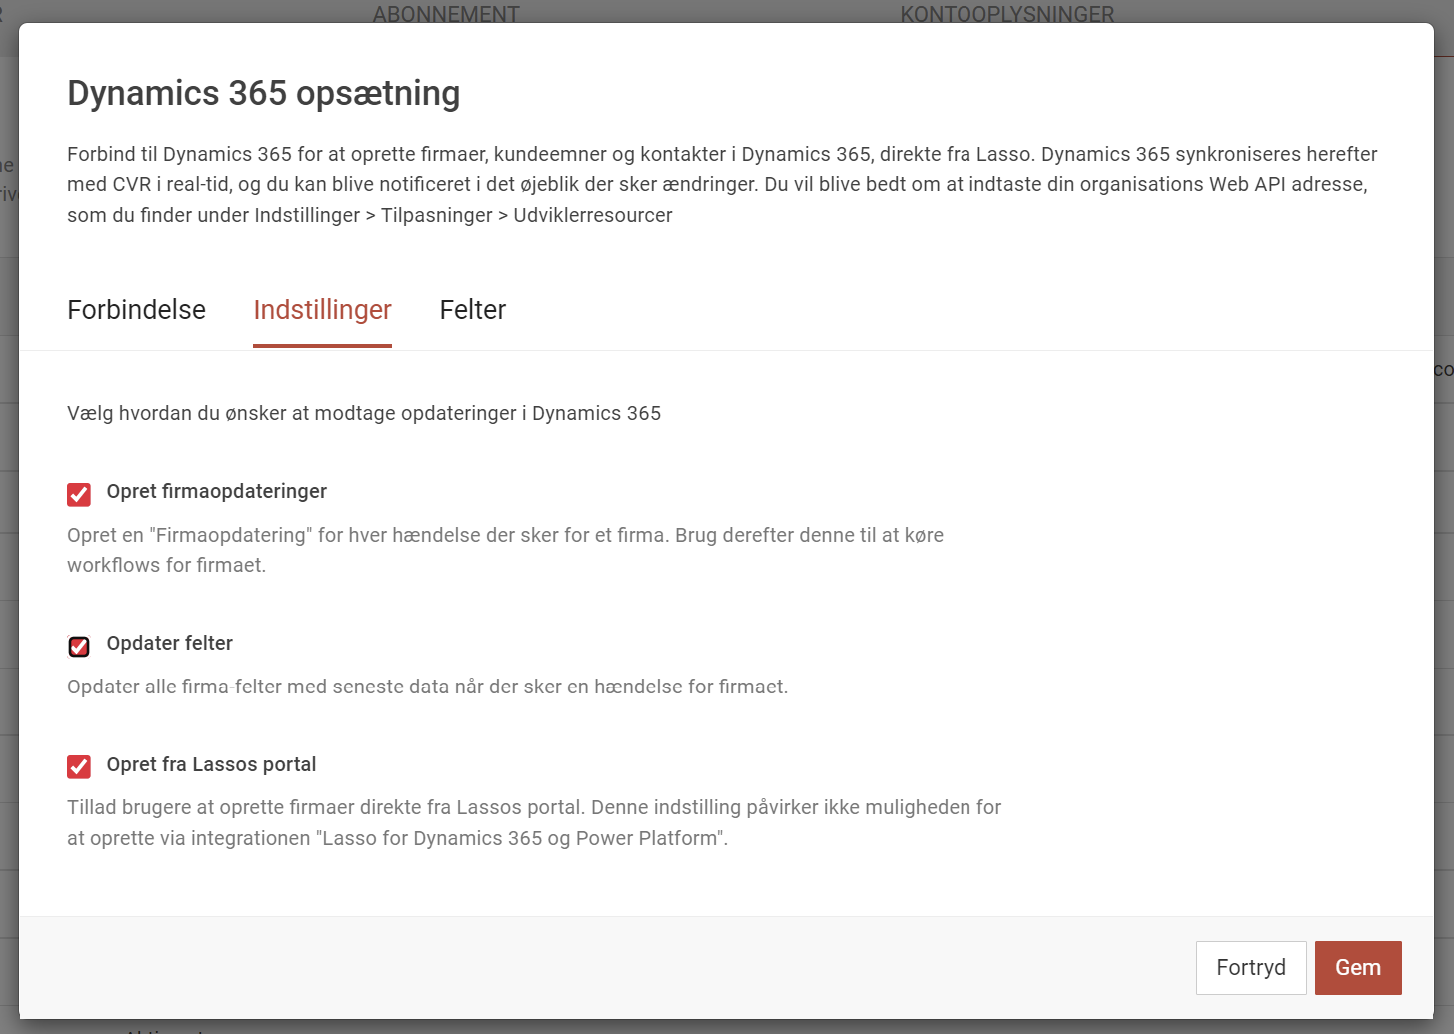
This is the default offering we have for any integration; map your fields in CRM to fields from Lasso and put a checkmark in 'Opdater felter', and we will make sure those fields are kept up-to-date with the newest information. No code or setup in Dynamics 365 required, all is handled from within Lasso.
Option 2: Update notifications ('Opret firmaopdateringer')
We also offer a more customizable solution; having updates sent as metadata. That is, once an update occurs, we will create and relate a new object (a 'Firmaopdatering') to the monitored entity in Dynamics 365, which contains the types of changes that have occurred, such as 'Regnskab', or 'Bestyrelsesændring'. The idea is then that you can use the Dynamics 365 Platform to react to the creation of those entities, e.g. by retrieving the data from Lasso and updating the fields you require, notifying relevant people, or whatever you desire.
To get the required objects (ie. 'Firmaopdatering') for Dynamics 365, visit the download page at DynamicsCRM.dk. You will currently need the 'Workflow Plugins' solution file in order for Lasso to create 'Firmaopdateringer'. This solution also contains workflow plugins to fetch data from Lasso, though we suggest using our Power Automate Connector for your implementation instead, as it is what is currently recommended by Microsoft, and because it supports a wider range of data to be fetched from Lasso.
Best of both worlds
Note that these options are not mutually exclusive; you can have your fields updated directly, while receiving notifications about the changes that have occurred at the same time.
Types of notifications
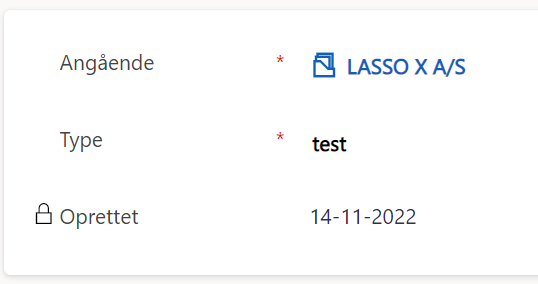
When a 'Firmaopdatering' is created and associated with an entity, the type of update is recorded in the "Type" field. This is a text field, containing a string representing the update, e.g. "Status" for status-changes, "Antal ansatte" for change in the number of employees and so forth. If multiple updates are registrered at the same time, the types will be separated by a pipe |.

Keeping it simple?
Please note that "Staminformation" is a catch-all for most basic information changes, which means you can just watch out for this type if you want to react to any of them in the same way. It is present whenever any of the following updates happen: Adresse, Binavn, Bibranche, Branche, Fax, Formål, Email, Navn, Selskabskapital, Tegningsregler, Telefon, Virksomhedsform, Website
The full list of types of updates is listed in the below table:
Types of Firmaopdateringer
Adresse
Anden reel ejerskabsændring
Antal ansatte
Årsrapport
Bestyrelsesændring
Bibranche
Binavn
Branche
Deltagerændring
Direktionsændring
Ejerskab af virksomhedsejendom påbegyndt
Ejerskabsændring
Email
Fax
Fjernet fra overvågelse
Formål
Fusion
Gentag forsøg
Going concern
Kontaktperson fjernet fra hjemmeside.
Kontaktperson(er) fundet på hjemmeside.
Kontaktpersoner fra hjemmeside opdateret
Livsforløb afsluttet
Livsforløb startet
Manuel opdatering
Navn
Ny besked fra Statstidende
Ny historie
Ny Paqle artikel
Ny pressemeddelelse
Nyt datterselskab
Nyt firma
Nyt telefonnummer
Overvågningshandling
PEnhedFjernet:{PNUMMER}
PEnhedOpdateret:{PNUMMER}
PEnhedTilføjet
Potentiel overvågnings match
Prospect fundet
Prospecting tidspunkt nået
Reel ejerskab
Reel stemmeandel
Reklamebeskyttet
Revision
Selskabskapital
Sidst opdateret
Søgedatabase opdateringskandidat
Søgedatabasen blev opdateret
Staminformation
Status
Tegningsregler
Teknologier fra hjemmeside opdateret
Telefon
Tilføjet til overvågning
Ukendt
Ultimativ ejerskab
Vedtægter
Virksomheden startede som ejendomsadministrator
Virksomheden stoppede som ejendomsadministrator
Virksomhedens autorisationer ændret
Virksomhedens ejendomsbesiddelse ophørte
Virksomhedens ejendomsejerskabsændring tilbagerullet
Virksomhedsform
Website
Ændring af ejendomsejerskab
Reacting to an update notification
Here's the steps on how you can create a flow in which your CRM system will automatically respond to an update notification. Before following this guide, it is important to note that the CVR has to be present on the entity, in order to look up the company in Lasso.
Creating the trigger
- Visit https://make.powerautomate.com/ and click Create.
- Click Automated cloud flow and search for "dataverse" for the trigger. From here, choose "When a row is added, modified or deleted", finally press Create.
- In Change type, select for it to trigger upon creation.
- For Table name select "Firmaopdateringer".
- Select "Organization" as your Scope and click + New step.
Fetching the entity to update
- Select "Get a row by ID" in the Microsoft Dataverse connector.
- Choose Accounts as your Table name.
- Choose Associated(Value) as your Row ID and click + New step.
Getting company data from Lasso
- Select "Lasso X" in the list of premium connectors, and depending on your needs, select the appropriate action, e.g. "Get company information".
- Fill in the field that the Lasso X connector requires. You can choose this dynamically by simply selecting it from the list of dynamic content. Typically this will you use for CVR. Now click + New step.
Creating an action
- Finally, choose the action that should occur when this flow is triggered, and fill out the required fields. For this, you will have the Lasso X data available to you. If you wish to update the row that got an update notification, simply fill in the fields Table name and Row ID, where Table name is either "Accounts" or "Leads", and Row ID, is an id to be found in Dynamic content as either "Account" or "Lead". Then choose the fields you want to update.
- Test your flow in the top right and fix any potential errors before pressing Save.
If done correctly, you will end up with a flow looking approximately as such:

Testing update notifications
You might find it necessary to test the update notifications, without having to wait for an actual update to occur. To do this, trigger an update by calling a specific endpoint:
POST https://api.lassox.com/integrations/dynamicscrm/test/push?lassoId=CVR-1-34580820&message=test&accesskey={API_KEY}
Make sure the provided lassoId is being monitored by Lasso, so that Lasso can find the corresponding entity in Dynamics 365. Also make sure to use the correct API key.
This will create a an Update notification (Firmaopdatering) in Dynamics 365 with the provided message as Type.
View Lasso directly in Dynamics CRM
Visit dynamicscrm.dk for an in-depth walkthrough
This section will be concerned with technical documentation of the Dynamics 365 integration. To download the solution file and learn more about the specific features in CRM, please visit our dedicated website at DynamicsCRM.dk
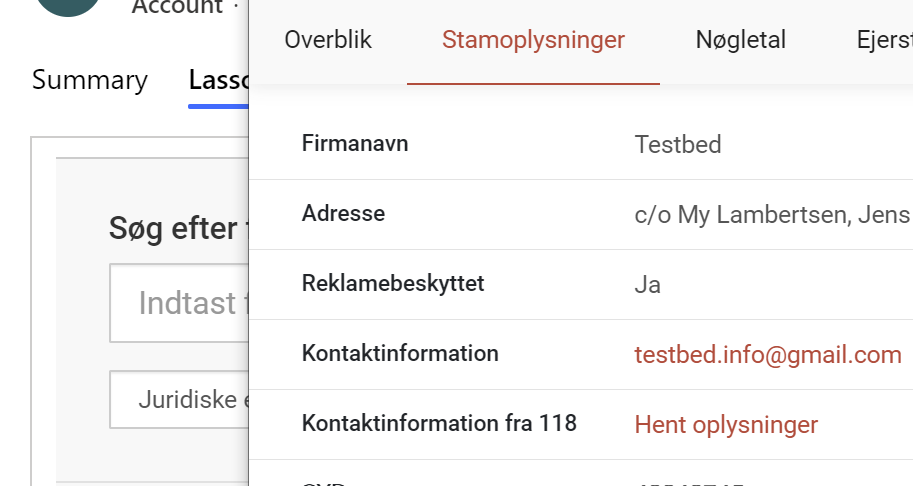
Lasso is fully integrated into Dynamic 365 Power Platform. This means that you can experience Lasso visually in the same way as if you were using the Lasso portal. Here's is a quick overview of the main functionality:
- Quickly create Accounts and Leads by searching CVR.
- View all Lasso modules for Accounts, Leads and Contacts, directly from their respective forms.
- Access Målgruppesøgning directly from CRM and import Accounts or Leads while also adding them to Marketing Lists.
- Use our Workflow Plugins to enrich your data and give your workflows super-powers!
Customizations
You can customize various aspects of the integration with Dynamics 365. Use the Table of contents to find what your looking for, or simply read on below. If a customization is not available in older versions, it will be noted in the description.
For most customizations you will have to edit the Lasso Configuration File webresource. Here's how to do that:
-
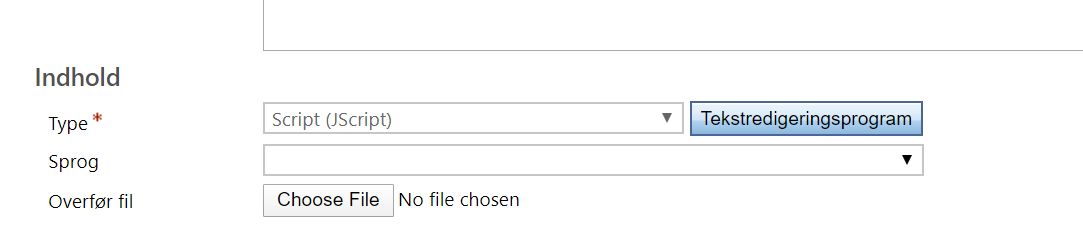
Locate the "Lasso Configuration File" web resource by going to Settings > Customizations > Customize the system. Under Components in the menu to the left, select Web Resources. Double click the web resource.

-
Click the "Text Editor" button to begin editing the configuration file.
Always open Lasso when creating Accounts or Leads
This feature is available from version 3.0.0
Normally the user will have to click the Lasso tab to open the Lasso quick-create module. You have the option to automatically select the tab when creating an Account or a Lead.
In the Lasso Configuration File webresource, locate the window.lasso.config.configurations section. To automatically expand Lasso on create, set the value next to showLassoOnCreateAccount and showLassoOnCreateLead to true, for Accounts and Leads respectively.
If you have upgraded from a previous version without this section, you can add the following to the end of the file.
window.lasso.config.configurations = {
    showLassoOnCreateAccount: true,
    showLassoOnCreateLead: true
};
Force the user to use Lasso when creating Accounts or Leads
This feature is available from version 3.0.0
This settings will make sure that Lasso is this only visible tab on the form during creation of Accounts or Leads, thereby making sure that the user does not manually type in (potentially wrong) data.
In the Lasso Configuration File webresource, locate the window.lasso.config.configurations section. To hide other tabs on create, set the value next to forceLassoOnCreateAccount and forceLassoOnCreateLead to true, for Accounts and Leads respectively.
If you have upgraded from a previous version without this section, you can add the following to the end of the file.
window.lasso.config.configurations = {
    forceLassoOnCreateAccount: true,
    forceLassoOnCreateLead: true
};
Set up field-mappings
When an Account, Lead or Contact is created in CRM by Lasso, fields are populated with data from e.g. CVR. Only a few fields like Name and Address are mapped per default, but you have the option to map more fields if you wish to do so. Here's how:
Locate the mapping section pictured below, starting from line 4. It should look something like the below:
window.lasso.config.customMappings = {
    company: {
        account: [
            //{ source: 'cvr', target: 'mit_cvr_felt', convertToType: 'string' },
            //{ source: 'industry.text', target: 'mit_branchekode_felt' }
        ],
        lead: []
    },
    person: {
        contact: []
    }
};
As you can see there are already two field-mappings from a Company to an Account, but they have been disabled using
//.
Add your own mapping by removing the // and replacing source and target, where source is the field from a Company or Person in CVR, and target is the field to map to in CRM. It's important to note that your must specify the Schema name in the target field.
If you add multiple mappings do not forget to end each line with a comma , to make it valid JSON.
Here is an example of mapping the CVR number to "AccountNumber", and number of employees and the company industry to our own custom fields:
window.lasso.config.customMappings = {
    company: {
        account: [
            { source: 'cvr', target: 'AccountNumber', convertToType: 'string' },
            { source: 'employees.count', target: 'new_Employees' },
            { source: 'industry.text', target: 'new_Industry' }
        ],
        lead: []
    },
    person: {
        contact: []
    }
};
Finally, don't forget to save and publish the changes. You're all done!
All fields available from the API - for companies, people and production units - will be available at the time of mapping.
For a full list, see the CVR documentation. See below for the most commonly used mappings.
Commonly used field mappings
Below are some of the most used fields:
lassoId: "CVR-1-34580820"
cvr: "34580820"
// available if you're creating a production unit
pNumber: "9876543210"
name: "LASSO X A/S"
address.address1: "Rådhuspladsen 37-38"
address.address2: "1550 København K"
address.streetName: "Rådhuspladsen"
address.houseNumber: "37-38"
address.postalCode: "1550"
address.postalDistrict: "København K"
address.municipality: "KØBENHAVN",
form.shortDescription: "A/S"
form.longDescription: "Aktieselskab"
phone: "71747812"
website: "www.lassox.com"
email: "kontakt@lasso.dk"
employees.count: 16
employees.fullTimeEquivalentCount: 14.4
industry.text: "Databehandling, webhosting og lignende serviceydelser"
industry.code: "631100"
status: "Normal"
purpose: "Selskabets formål er at drive...."
powerToBind: "Selskabet tegnes af en direktør i forening med...."
// reklamebeskyttet
commerciallyProtected: true
// Creation date
lifeTime.from: "2012-05-14T00:00:00"
// Current CEO name
management.ceo.name: "Lars Larsen"
Field mapping tips and tricks
If you are sending a number to a string field, convert using "convertToType":
{ source: 'cvr', target: 'AccountNumber', convertToType: 'string' }
You can comebine fields from CVR using a space, like so:
{ source: 'streetName streetNumber', target: 'Address1_Line1' }
You can add a static value to a field using the value property:
{ source: '', target: 'Address1_Country', value: 'Danmark' }
Here Danmark will always be added to the country field in CRM. However, please note that this is different for Option Sets, where the Id of the option must be wrapped in an object:
{ source: '', target: 'new_leadType', value: { Value: 12321 } }
Change the order of modules in the Lasso iframe
If you want to change the order of modules in the iframe, there's a way to do just that! Simply type in the wanted order of modules in the appOrder setting, in the Lasso Configuration File webresource under window.lasso.config.configurations.

The modules you add will take precedence over other modules, and remaining modules will follow in the default order. Here's an example:
window.lasso.config.configurations = {
    appOrder: ['information', 'cvrkeyfigures', 'news']
};
Click below to see of list of all the available modules. Modules not included in your subscription will be ignored.
Available modules
Dashboard: dashboard
Staminformation: information
Nøgletal: cvrkeyfigures
Ejerstruktur: cvrownership
Nyheder: news
Historik: cvrhistory
Tvilling: twinfinder
Rating: rating
Firmaindsigt: companyinsight
Revision: accountant
Finans: finance
KAM: kam
Reelt Ejerskab: trueownership

Skriv til hvis du mangler navnet på andre moduler, på support@lassox.com.
Preview a company before creating it
When creating a Account or Lead, it can be useful to preview the the respective company before creating it. This setting will add a preview link next to the create button, which will open a prefered Lasso module in a popup for previewing.
To enable, edit the setting companyPreviewApp in the Lasso Configuration File webresource under window.lasso.config.appConfigurations. Type in the module you want to open when clicking the preview link. See a list of available modules in Available modules in the previous setting.
window.lasso.config.appConfigurations = {
    lassosearch: {
        companyPreviewApp: 'information',
        companyPreviewMenu: true,
        companyPreviewToken: 'TOKEN_HERE'
    }
};
By setting companyPreviewMenu to true, a menu will be included in the popup to open other modules from the preview popup.
The companyPreviewToken setting allows you to use the preview functionality for users that are inactive (i.e. without a Lasso license). Users without a license will be able to preview entities using the provided token, which can be obtained through Lasso support.
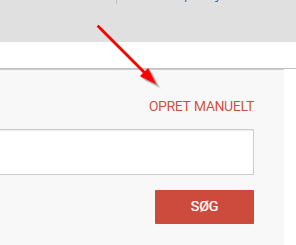
Allow a user to create accounts and leads manually
In versions earlier than 3.0.0, the user is forced to create accounts and leads using Lasso, but will be able to create them manually by clicking a toggle (link) in the quick-create module. From version 3.0.0 and up, this toggle is hidden by default, as forcing the user to create using Lasso is now an opt-in feature.
 Sometimes however, you may want to show or hide the toggle that enables manual creation, no matter the version you are running. To do this, you can add a setting to override the default behaviour.
To show or hide the toggle, edit the setting showCreateManually in the Lasso Configuration File webresource under window.lasso.config.appConfigurations > lassosearch. By setting to true, the toggle will be visible, and false will hide it.
window.lasso.config.appConfigurations = {
    lassosearch: {
        showCreateManually: true
    }
};
Read only mode
Lasso shows data side by side with data in CRM, but also allows the user to create CRM entities directly from the Lasso iframes. An example is importing with Målgruppesøgning or creating accounts using the preview panel shown on the right when clicking the name of a company:
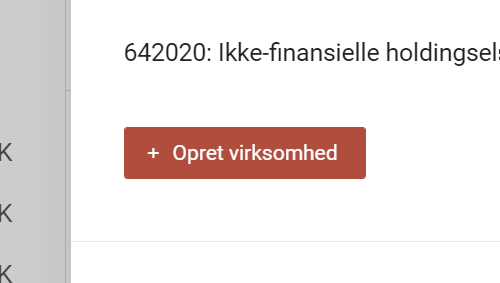
To disable all the functionality that make changes to CRM, e.g. by hiding the button in the above image, simply toggle the readOnly setting in the Lasso Configuration File webresource under window.lasso.config.configurations. By setting it to true, create- and update functionality is disabled throughout Lasso. Please be aware that this does not hide Lasso from the Create forms in CRM, but simply removes its abiity to complete any create- or update actions.
If you only want to disable the ability to create from the preview panel, and not e.g. Lasso Search, use the readOnlyEntityPreview setting instead.
window.lasso.config.configurations = {
    readOnly: true, // do not allow Lasso to make any changes
    readOnlyEntityPreview: true // do not allow Lasso to create entities using the preview panel
};
Do not allow creating contacts when creating company
When you create a company with Lasso, the popup to do so makes it possible to also create related contacts. In order to disable this possibility, effectively hiding the contacts, simply toggle the onCreateCompanyDisableContacts setting in the Lasso Configuration File webresource under window.lasso.config.configurations.
window.lasso.config.configurations = {
    onCreateCompanyDisableContacts: true
};
By setting it to true, the user can no longer include contacts when creating a company using Lasso.
Do not perform duplicate checks when creating contacts
When you create a company, and select one or more contacts to be added as well, normally a duplicate check is performed to avoid creating contacts that already exists in CRM. By toggling the setting onCreateCompanyAllowDuplicateContacts to true in the Lasso Configuration File webresource under window.lasso.config.configurations, the duplicate check is disabled. Therefore duplicate contacts will be created if an imported person exists elsewhere in CRM.
window.lasso.config.configurations = {
    onCreateCompanyAllowDuplicateContacts: true
};
Do not perform perform duplicate checks using Lasso Search
When searching for companies to create using Lasso Search, Lasso will automatically match search results with duplicates found in CRM. If one is found, the "create" button will be replaced with a "View" button, meaning that duplicates cannot be created. To disable this check, thus allowing duplicates to be created, add the following to the config file.
window.lasso.config.appConfigurations = {
    lassosearch: {
        allowDuplicates: true
    }
};
Preventing duplicates across Leads and Accounts using Lasso Search
When you create an account using Lasso Search, duplicates will be detected among other accounts. The same goes for leads, where duplicates will be found among other leads.
In order to check for duplicates across leads and accounts, you must enable it. That way, you cannot create accounts if they exist as leads, and vice versa.
window.lasso.config.appConfigurations = {
    lassosearch: {
        crossEntityDuplicateDetection: true
    }
};
Setup the Lasso iframe manually
Lasso is only enabled on default form for Accounts and Leads. In case you have a custom form, Lasso will have to be manually added. Don't worry, it's very simple.
- Open you form in edit mode and open the
Form propertieswindow.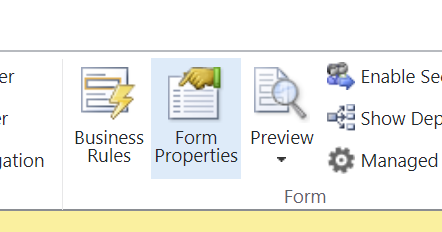
- Include the two scripts
Lasso LoaderandLasso Configuration File.
- Under
Event handlers, add the functionlasso.setupfrom theLasso Loaderscript and enable it.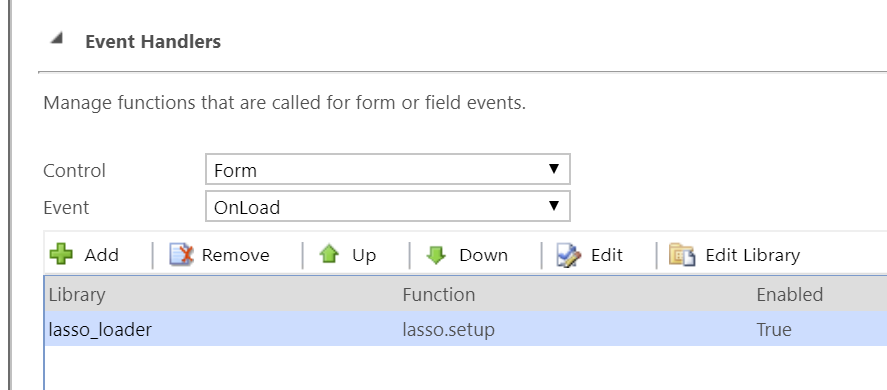
- Back on the form, include the
Lasso Idfield somewhere. Hide the field unless you have a need for it to be visible. - Add a tab with a section that has an iframe in it. Make sure to include the text
lassoin the name of the iframe, e.g. "iframe_lasso". You can se the iframe URL tohttps://apps.lassox.com/static/pages/blank.html, and finally uncheck the checkbox to "Restrict cross frame scripting, where supported".
Are you using an earlier version than 3.0.0?
For older versions the process has a few more steps. Contact us at support@lassox.com for details.
That's it! Lasso should now load automatically in the new tab, when a Company or Lead is opened.
Do not forget to check out our Workflow Plugins if you wish to really power up your CRM with realtime data capabilities. See more at dynamicscrm.dk.